In this tutorial, we will see how to build wxWidgets on a windows machine from source using Visual Studio.
For this build, I will be using Visual Studio 19. You may use other versions as well.
Download the Source Code
Go to wxWdigets Site and download the Latest Development Release as source code. I will use wxWidgets version 3.2.4 for this tutorial.
UnZip the source code files in a directory where you wish to install the SDK
My personal preference is at “C:\dev\SDK\wx324\“. For convenience, I will refer to this directory as $(WXDIR)
Note: I named the folder wx324 because I am using version 3.2.4 for different versions the name should correspond to the version number.
The source code comes with many Visual studio solution files. Go to “$(WXDIR)\build\msw“
Run the Visual Studio solution corresponding to your VS versions. If you are running Visual Studio 16 or later, choose “wx_vc16.sln“. Accept the security warning message boxes.
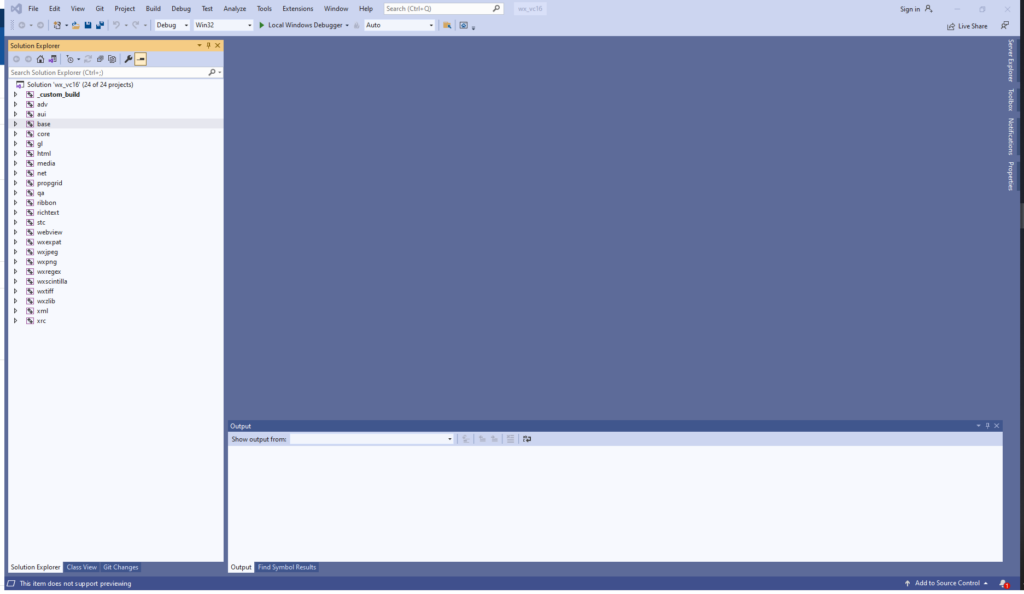
You should see the many solutions in the Solution Explorer.
Build wxWidgets
In Visual Studio go to Build->Batch Build
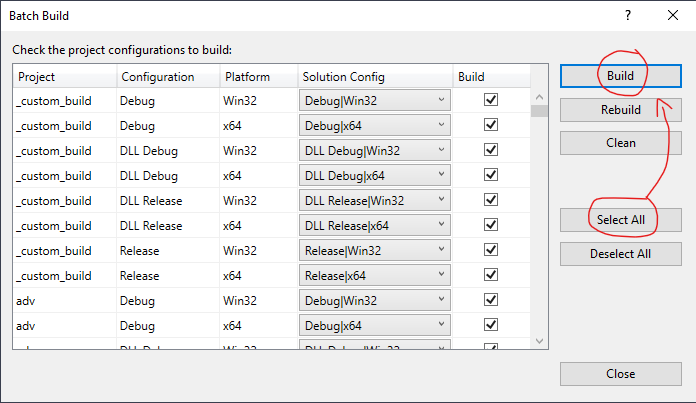
Select All and then Hit Build
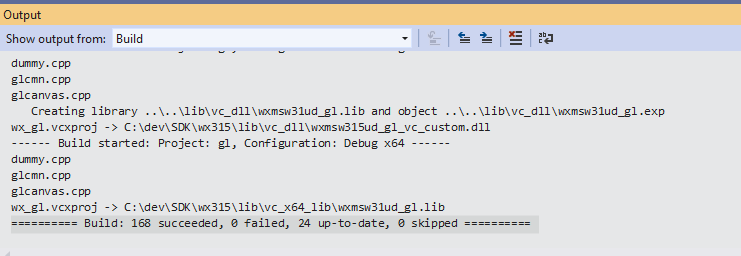
Make a cup of coffee and wait for the build to finish.
When the build is over you should see the following message:
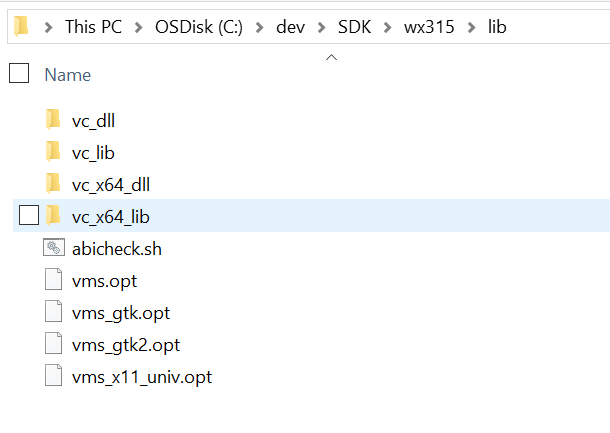
You can find the compiled binaries at “$(WXDIR)\lib“
Create an App
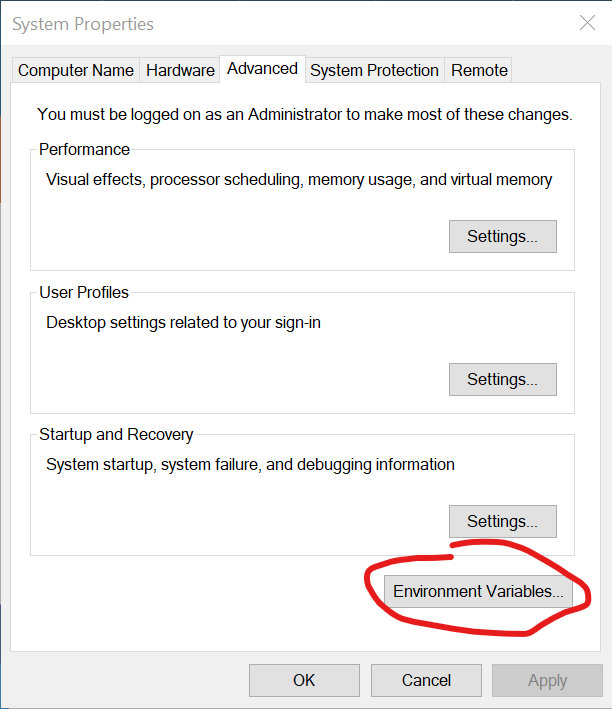
First set an environment WXDIR
open System Properties->Environment Variable
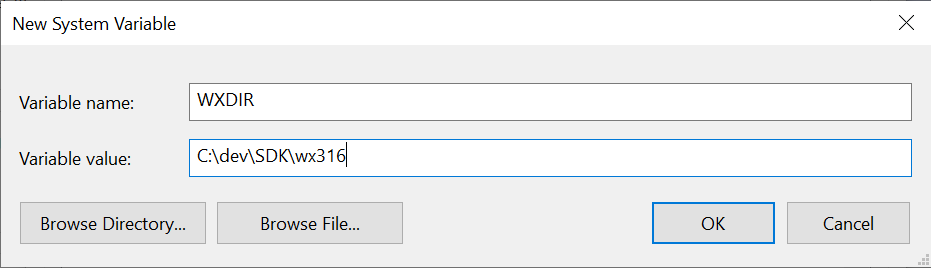
Add a new variable called WXDIR.
NOTE: do not add a trailing slash “\”
Open a new Project in Visual Studio
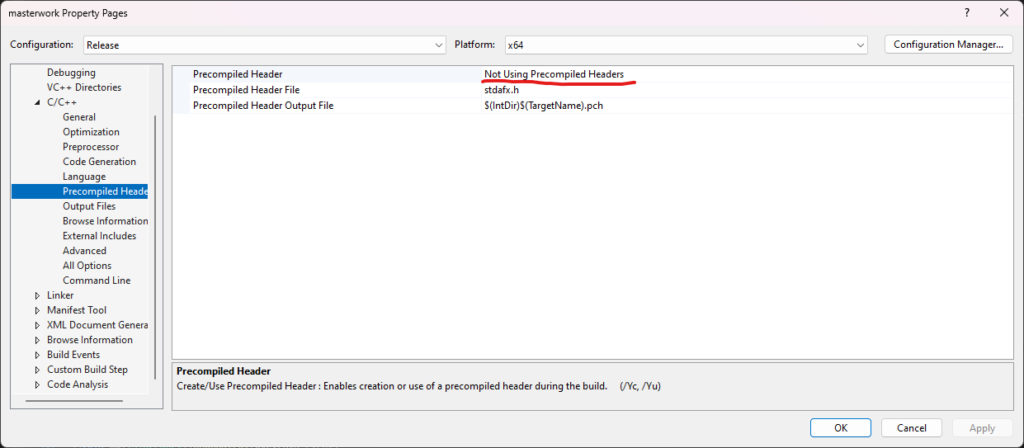
Open the project properties -> C/C++ -> General
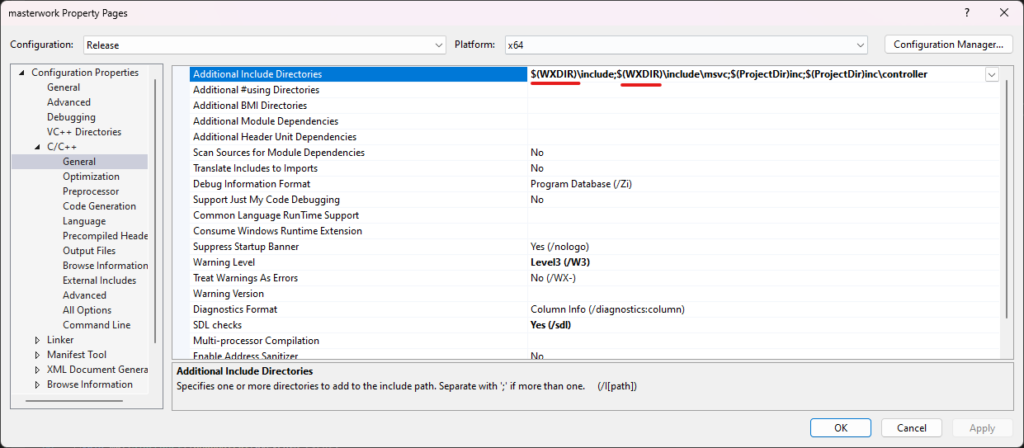
also select “Not Using Precompiled Headers”